[Panasonic] Android Phone Wired Upload
A data cable connection is the simplest, most stable, and most efficient connection method. By connecting the Android phone and the camera through an OTG data cable, the photos in the camera can be quickly transferred to the UPHOTO cloud.
I. Phone Settings
Set the phone to be available after the screen is off.
- Please refer to Android Settings for Shooting with Screen Off to set up according to your phone brand.
OPPO, vivo, and OnePlus phones need to manually turn on the OTG function in the settings. Huawei, Xiaomi, Honor, Samsung and other phones do not need to manually turn on the OTG function.
- Steps to turn on: In Phone Settings -> Other Settings or More Settings -> OTG or OTG Connection
- You can also directly search for "OTG" in "Settings"
Note: If the phone's OTG connection is not used for more than 5 minutes (some are 10 minutes), you need to manually turn on the OTG function again.
II. Camera Settings
Set the camera power to the maximum time to keep the camera always on.
Set the photo format to JPEG or JPEG+RAW format.
Set the camera date and time to the current date and time.
Turn off camera settings such as Bluetooth, WiFi, and FTP transfer (ignore if there are no related settings).
Turn off "USB Power Supply". As shown below:

Set upload mode.
6.1 Set to "Manual Upload" mode.
"Manual Upload" mode: When the camera is disconnected from the phone, take some photos (such as dozens), and then connect the camera and the phone to import the photos from the camera to the phone through the "UPHOTO Live APP".
- In this mode, only all image data in card slot 1 is read.
- In this mode, when the camera and phone are connected, the camera cannot take photos, and you need to disconnect before you can shoot. Set "USB Mode" to "PictBridge(PTP)" mode. As shown below:

6.2 Set to "Shoot and Transfer" mode.
"Shoot and Transfer" mode: When the camera and phone are connected, after the camera takes a photo, the photo in the camera is automatically imported into the phone through the "UPHOTO Live APP".
Set "USB Mode" to "PC(Tether)" mode. As shown below:
III. Connect Phone to Camera
- Plug the data cable into the camera. If it is a data cable purchased from UPHOTO, plug the red end of the data cable into the camera. If the data cable is a switch cable, make sure the switch is turned on.
- Plug the data cable into the phone.
- Purchase data cables and phone brackets: Purchase in the "Purchase Service" section of the UPHOTO official website or WeChat Mini Program (I am a photographer).
IV. Shoot and Upload
Open the "UPHOTO Live APP" and log in successfully.
An authorization request for "UPHOTO Live" will pop up in the APP. Check the default option and click the "OK" button. As shown below:
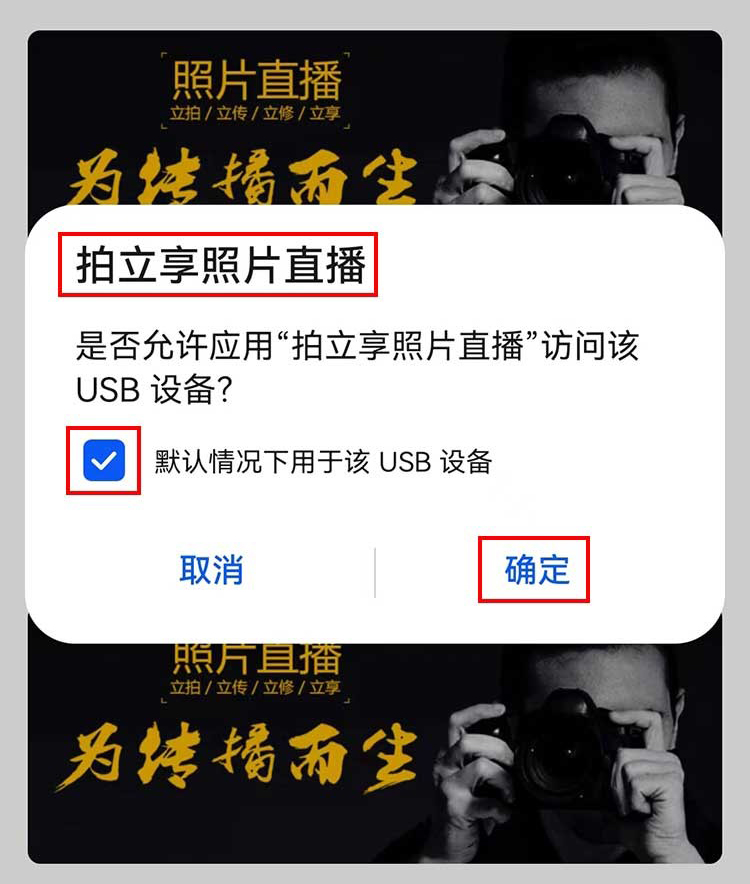
If you accidentally click "Cancel", please unplug the data cable on the phone side and plug it in again.
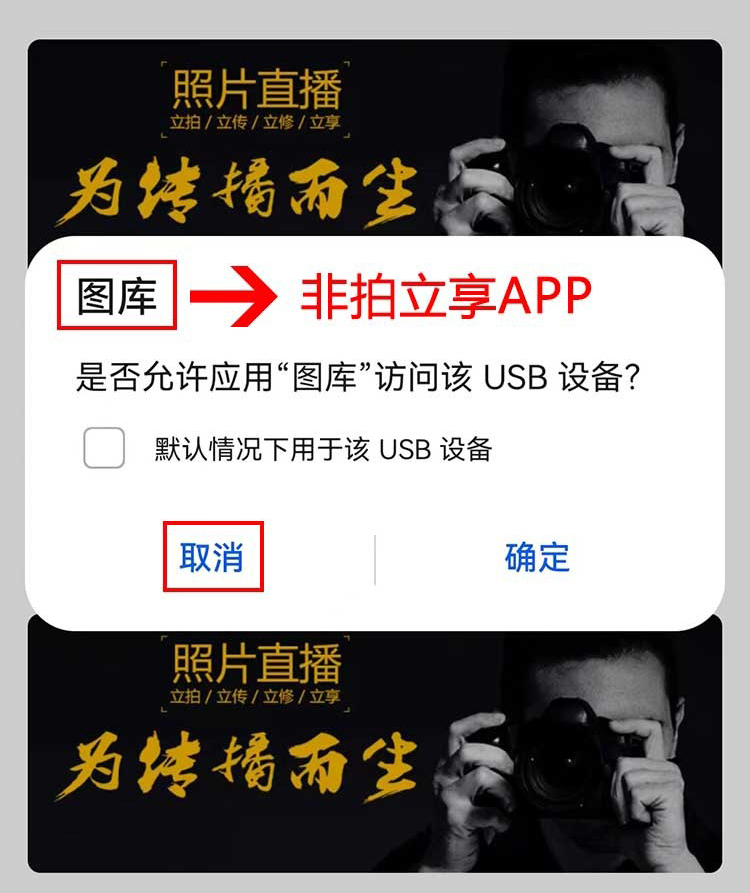
Note: After the phone and camera are connected, if an authorization request for "Non-UPHOTO" (such as Gallery, Album, etc.) pops up on the phone, please click the "Cancel" button. As shown below:
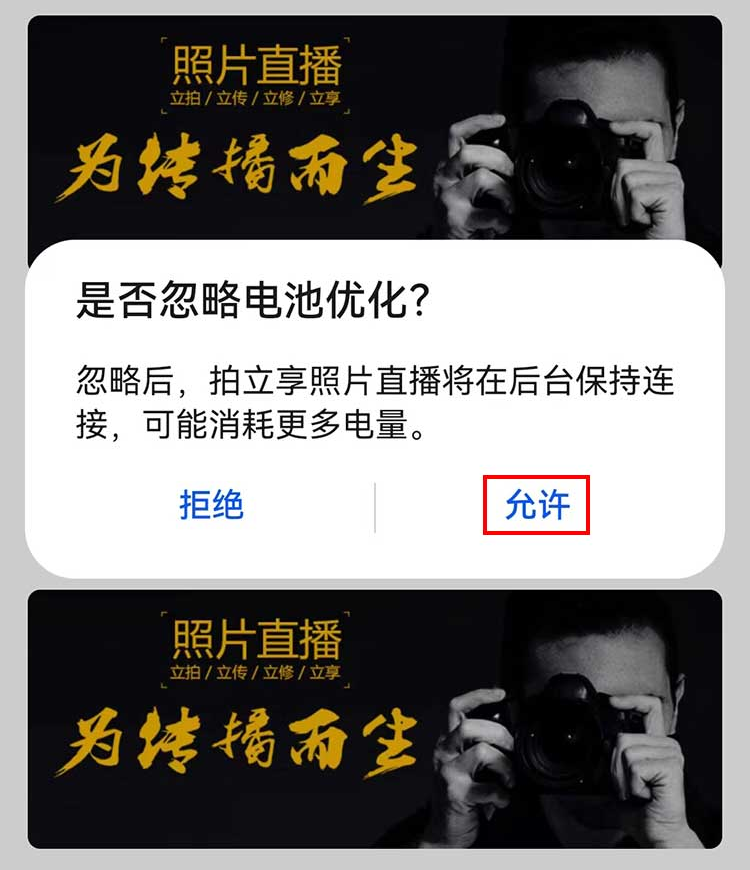
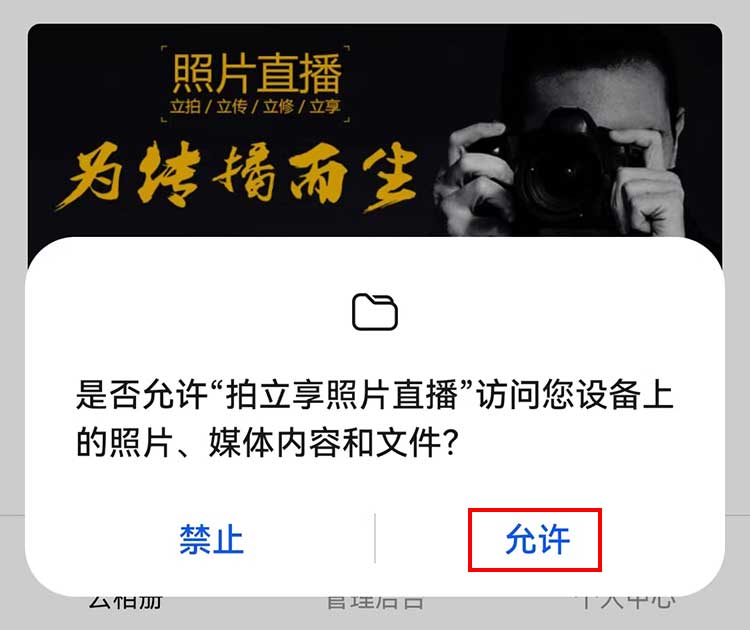
In the APP album list, select the album you want to shoot, click the "Upload Now" button, and select "Wired Transmission". Note: When using the "UPHOTO Live APP" for the first time, authorization requests for "Ignore battery optimization" and "Access photos and media content on your device" will pop up, please click "Allow". As shown below:
After selecting the photo upload group, enter the "Shoot and Upload" interface. The upper left corner shows a green "Camera Connected", indicating that the phone has successfully connected to the camera, and you can shoot and upload photos.
Demo Video
Instructions for wired connection between Panasonic camera and Android phone (Shoot and Transfer) (GH6 as an example)
Instructions for wired connection between Panasonic camera and Android phone (Manual Upload) (GH6 as an example)
Common Problem Solving
Still cannot connect to the camera after multiple attempts.
- Check if the data cable is plugged in backwards. If it is a data cable purchased from UPHOTO, plug the red end into the camera. If the data cable is a switch cable, try the switch a few more times to ensure it is turned on.
- On the phone screen, swipe down from the top. Under normal circumstances, it will display "Connected to xxxx camera". If not, the data cable may be damaged. Try again with a different data cable.
- After confirming that the data cable is not damaged, while the data cable is connected, clear all APPs running in the background of the phone, then open the "UPHOTO Live APP" and enter the "Shoot and Upload" interface. Click the "Manual Authorization" button at the bottom of the interface, wait for 5 seconds, and an authorization request will pop up.
- You can try to "Clear all camera settings" or "Restore Factory Settings" in the camera settings, and then reconnect.
The camera is connected successfully, but the APP cannot recognize the photos in the camera.
- Check if the camera's photo format is set to JPEG or JPEG+RAW format.
- For multi-card slot cameras, set JPEG format photos to be stored on card 1.
- Format the memory card, take a new photo and try again.