[Sony] Apple Phone Wired Upload
A data cable connection is the simplest, most stable, and most efficient connection method. Using an Apple dedicated OTG data cable/adapter cable that supports data transmission to connect an iPhone and a camera allows you to quickly upload photos from the camera to the UPHOTO cloud.
Supported cameras: A1, A9, A99, A99M2, A77, A77M2, A7, A7M2, A7M3, A7M4, A7S, A7S2, A7S3, A7R, A7R2, A7R3, A7R4
- Other unlisted Sony cameras are basically also supported, please test them yourself before use.
I. Phone Settings
- System requirements: Supports iOS 15 and above.
- Cable requirements: Must use an Apple dedicated OTG data cable/adapter cable that supports data transmission; the original Apple charging cable generally does not support data transmission for this scenario.
- If you need to purchase cables, you can buy them in the "Purchase Service" section of the UPHOTO official website (www.uphoto.cc) or the WeChat Mini Program (I am a photographer).
II. Camera Settings
- Set the camera power to the maximum time to keep the camera always on. As shown below:

Set the photo format to JPG/JPEG (Apple wired transmission usually only supports JPG/JPEG).
Set the camera date and time to the current date and time (recommended to align with local time).
Check external connection/network settings, turn off communication functions such as Bluetooth, Wi-Fi, FTP transmission, etc. (ignore if there are no related settings).
Some models need to turn off "Ctrl w/ Smartphone".
- Steps to turn off: MENU -> Network -> Ctrl w/ Smartphone -> Ctrl w/ Smartphone
Set upload mode. Sony cameras all support "Manual Upload" mode, and some models support "Shoot and Transfer" mode.
1) Set to "Manual Upload" mode
"Manual Upload" mode: When the camera is disconnected from the phone, take some photos (such as dozens), and then connect the camera and the phone to import the photos from the camera to the phone through the "UPHOTO Live APP".
- In this mode, only all image data in card slot 1 is read.
- In this mode, historical photos in the camera (including photos taken before connection) can usually be read.
- It is recommended to insert only 1 memory card and place it in card slot 1 to avoid reading exceptions.
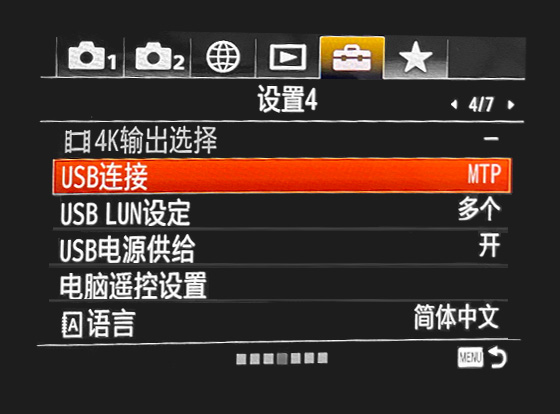
Set "USB Connection" to "MTP" mode, and prohibit setting "Select on connection". As shown below:
2) Set to "Shoot and Transfer" mode
"Shoot and Transfer" mode: When the camera and phone are connected, after the camera takes a photo, the photo in the camera is automatically imported into the phone through the "UPHOTO Live APP".
- In this mode, only photos taken after connection can be uploaded, and historical photos of the camera cannot be read. If you need to upload historical photos, please set the camera to "Manual Upload" mode.
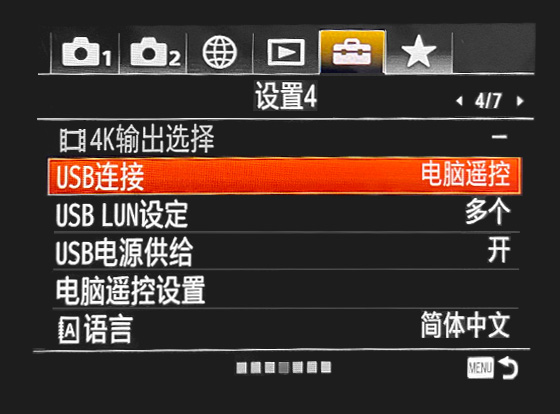
Set "USB Connection" to "PC Remote" mode. As shown below:
Enter "PC Remote Settings" and set "Still Img. Save Dest." to "PC+Camera". As shown below:
Important note: If this step is not set, the photos taken will not be saved to the camera memory card.
- If the connection is disconnected during the shoot and transfer process, photos taken during the disconnection cannot usually be read in this mode; if there is a missed transfer, you can change the "USB Connection" to "MTP" mode and read them again.
【Important Settings】For Sony 4th generation and above models, please perform the following settings
Enter "Network -> Connect/PC Remote -> PC Remote Settings", set "Save Image Size" to "Original", and set "Save JPEG Size" to "Large". As shown below:
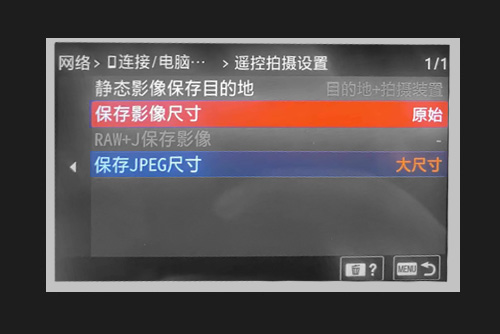
- If this step is not set, the uploaded photo size will only be about 1600px on the long side and only a few hundred KB in size.
- Sony A7M4 recommends upgrading the camera firmware to version 2.0 and above before making a wired connection.
III. Connect Phone to Camera
Connect the camera and iPhone with the data cable.
Note: Some iOS versions or Lightning interface models may have recognition delays. You can try to unplug and reconnect: wait about 30 seconds after each unplugging, then plug it in and wait about 30 seconds.
IV. Shoot and Upload
- Open the "UPHOTO Live APP" and log in successfully.
- In the APP album list, select the album you want to shoot, click "Upload Now", and select "Wired Transmission".
- Follow the prompts to select the upload group, upload size, and upload mode (manual upload/shoot and transfer), and enter the "Shoot and Upload" page.
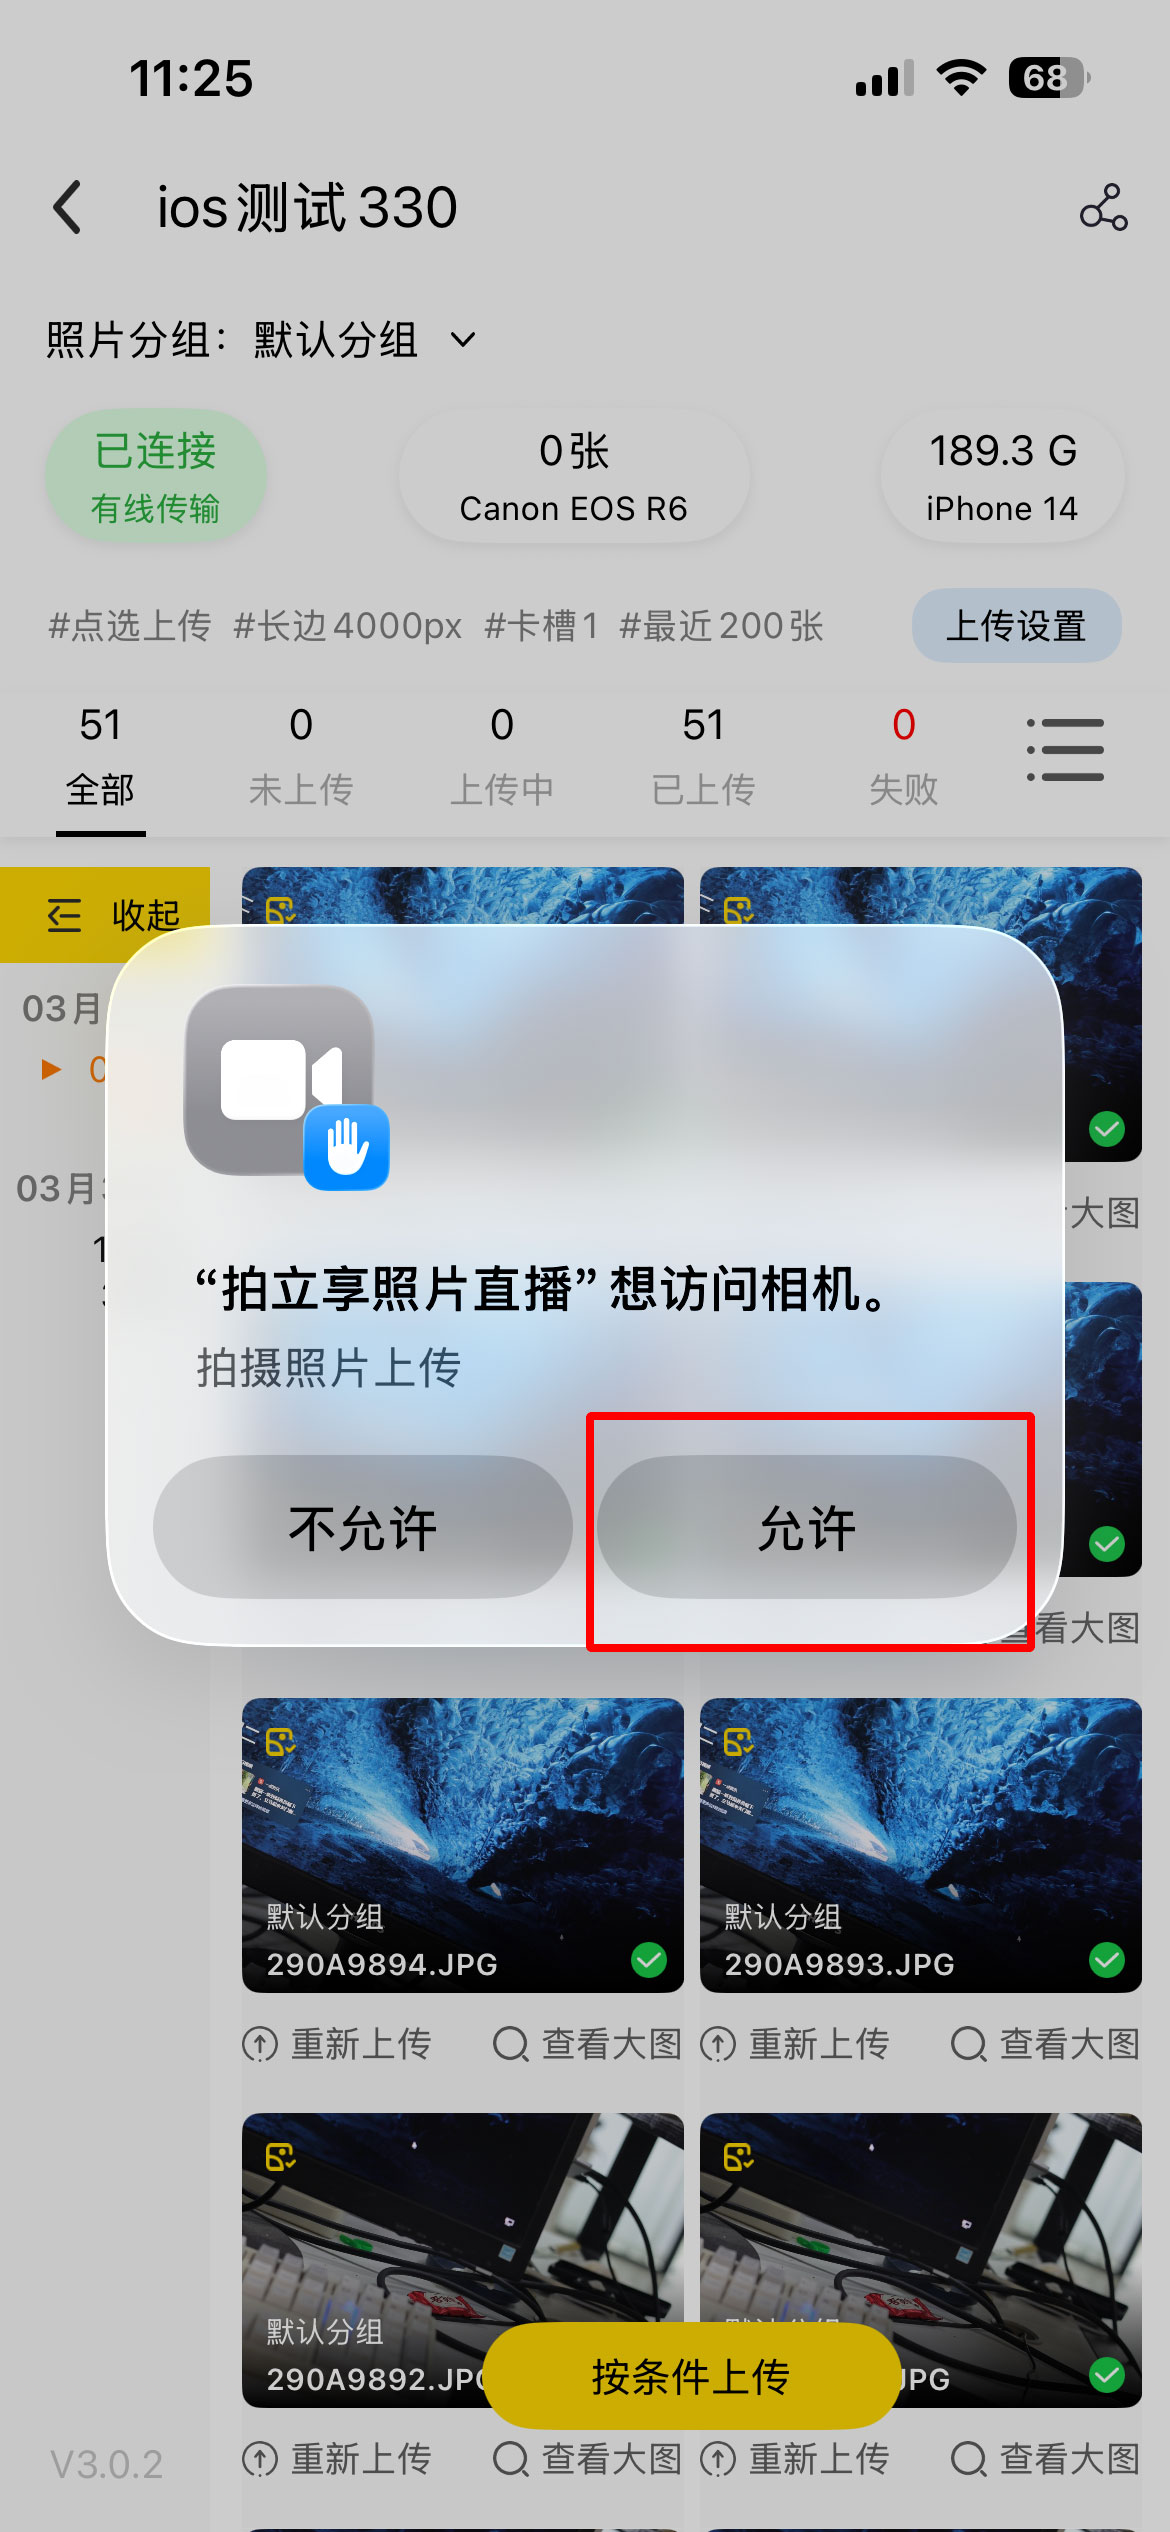
- Complete the authorization according to the system prompts (such as accessing USB devices/photos, etc.). As shown below:
- If you accidentally click reject, you can unplug the data cable on the phone side and plug it in again, and then authorize according to the prompts.
- When the upper left corner of the page shows a green "Camera Connected", it means the connection is successful and you can start uploading.
Note: If the page prompts disconnected, please first confirm whether the camera's USB connection mode matches the upload mode (manual upload = MTP; shoot and transfer = PC Remote/Remote settings).
Common Problem Solving
- Cannot connect to the camera (no response after repeated plugging and unplugging).
- Confirm that the iPhone system version meets the requirements (iOS 15 and above).
- Confirm that you are using an Apple dedicated OTG cable/adapter cable that supports data transmission, and replace the cable and try again if necessary.
- When the authorization pop-up appears, only allow "UPHOTO Live" to access, and complete the relevant permissions for photos, files, and folders in the system settings.
- Confirm that the UPHOTO Live APP is the latest version (try again after updating in the App Store).
- For manual upload mode, please set USB connection to "MTP"; for shoot and transfer mode, please set it to "PC Remote/Remote settings".
- Sony A7M4 recommends upgrading firmware to 2.0 and above before trying again.
- You can try to "Initialize" or "Restore Factory Settings" in the camera settings, and then reconnect.
- The connection is successful but photos cannot be recognized/transferred.
- Confirm that the photo is saved in JPG/JPEG format (switch JPEG/HEIF and other formats to JPEG).
- Confirm that the photo is saved in card slot 1 (it is recommended to insert only 1 card and place it in card slot 1).
- In manual upload mode, confirm that the USB connection is "MTP".
- In shoot and transfer mode, confirm that "Still Img. Save Dest." is "PC/Mobile/Destination+Camera".
- If you have deleted/moved photos in the camera midway, you can execute "Recover Image DB" in the camera, or format the memory card and shoot new photos to try again (be sure to back up in advance).