[Canon] Apple Phone Wired Upload
A data cable connection is the simplest, most stable, and most efficient connection method. Using an Apple OTG data cable/adapter cable that supports data transmission to connect an iPhone and a camera allows you to quickly upload photos from the camera to the UPHOTO cloud.
Supported cameras: 1DX, 1DX2, 1DX3, 5D2, 5D3, 5D4, 5DsR, 6D, 6D2, 60D, 7D, 7D2, R/RP, R5, R6/R62, R7
- Other unlisted Canon cameras are basically also supported, please test them yourself before use.
I. Phone Settings
- System requirements: Recommended iOS 15 and above.
- Cable requirements: Must use an OTG data cable/adapter cable that supports data transmission; the original Apple charging cable generally does not support data transmission for this scenario.
- If you need to purchase cables, you can buy them in the "Purchase Service" section of the UPHOTO official website (www.uphoto.cc) or the WeChat Mini Program (I am a photographer).
II. Camera Settings
- Turn off the camera's communication functions such as Bluetooth, Wi-Fi, FTP transmission, etc. (ignore if there are no related settings).
- For Canon 5D4, it is recommended to turn off the FTP function in "Communication settings" and upgrade the camera firmware to a newer version before trying again.
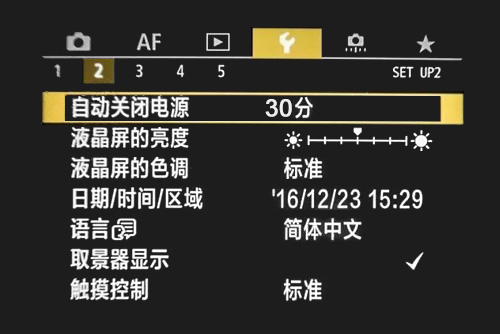
- Set the camera power/auto power off time to the maximum time to keep the camera always on. As shown below:
- It is recommended to set the photo format to JPG/JPEG.
- iPhone wired import usually only recognizes JPG/JPEG; if set to RAW/HEIF and other formats, it may not be recognized.
- It is recommended that the camera date and time be aligned with the local time (as accurate as possible to the second).
- Some models may need to set "Choose USB connection app" to "Photo Import/Remote Control" (or similar options) in the camera.
- Some models may need to set "Choose USB connection app" to "Photo Import/Remote Control" (or similar options) in the camera.
III. Connect Phone to Camera
Connect the camera and iPhone with the data cable.
Note: Some iOS versions or Lightning interface models may have recognition delays. You can try to unplug and reconnect: wait about 30 seconds after each unplugging, then plug it in and wait about 30 seconds.
IV. Shoot and Upload
- Open the "UPHOTO Live APP" and log in successfully.
- In the APP album list, select the album you want to shoot, click "Upload Now", and select "Wired Transmission".
- Follow the page prompts to select the upload group, upload method and other settings, and then enter the "Shoot and Upload" interface.
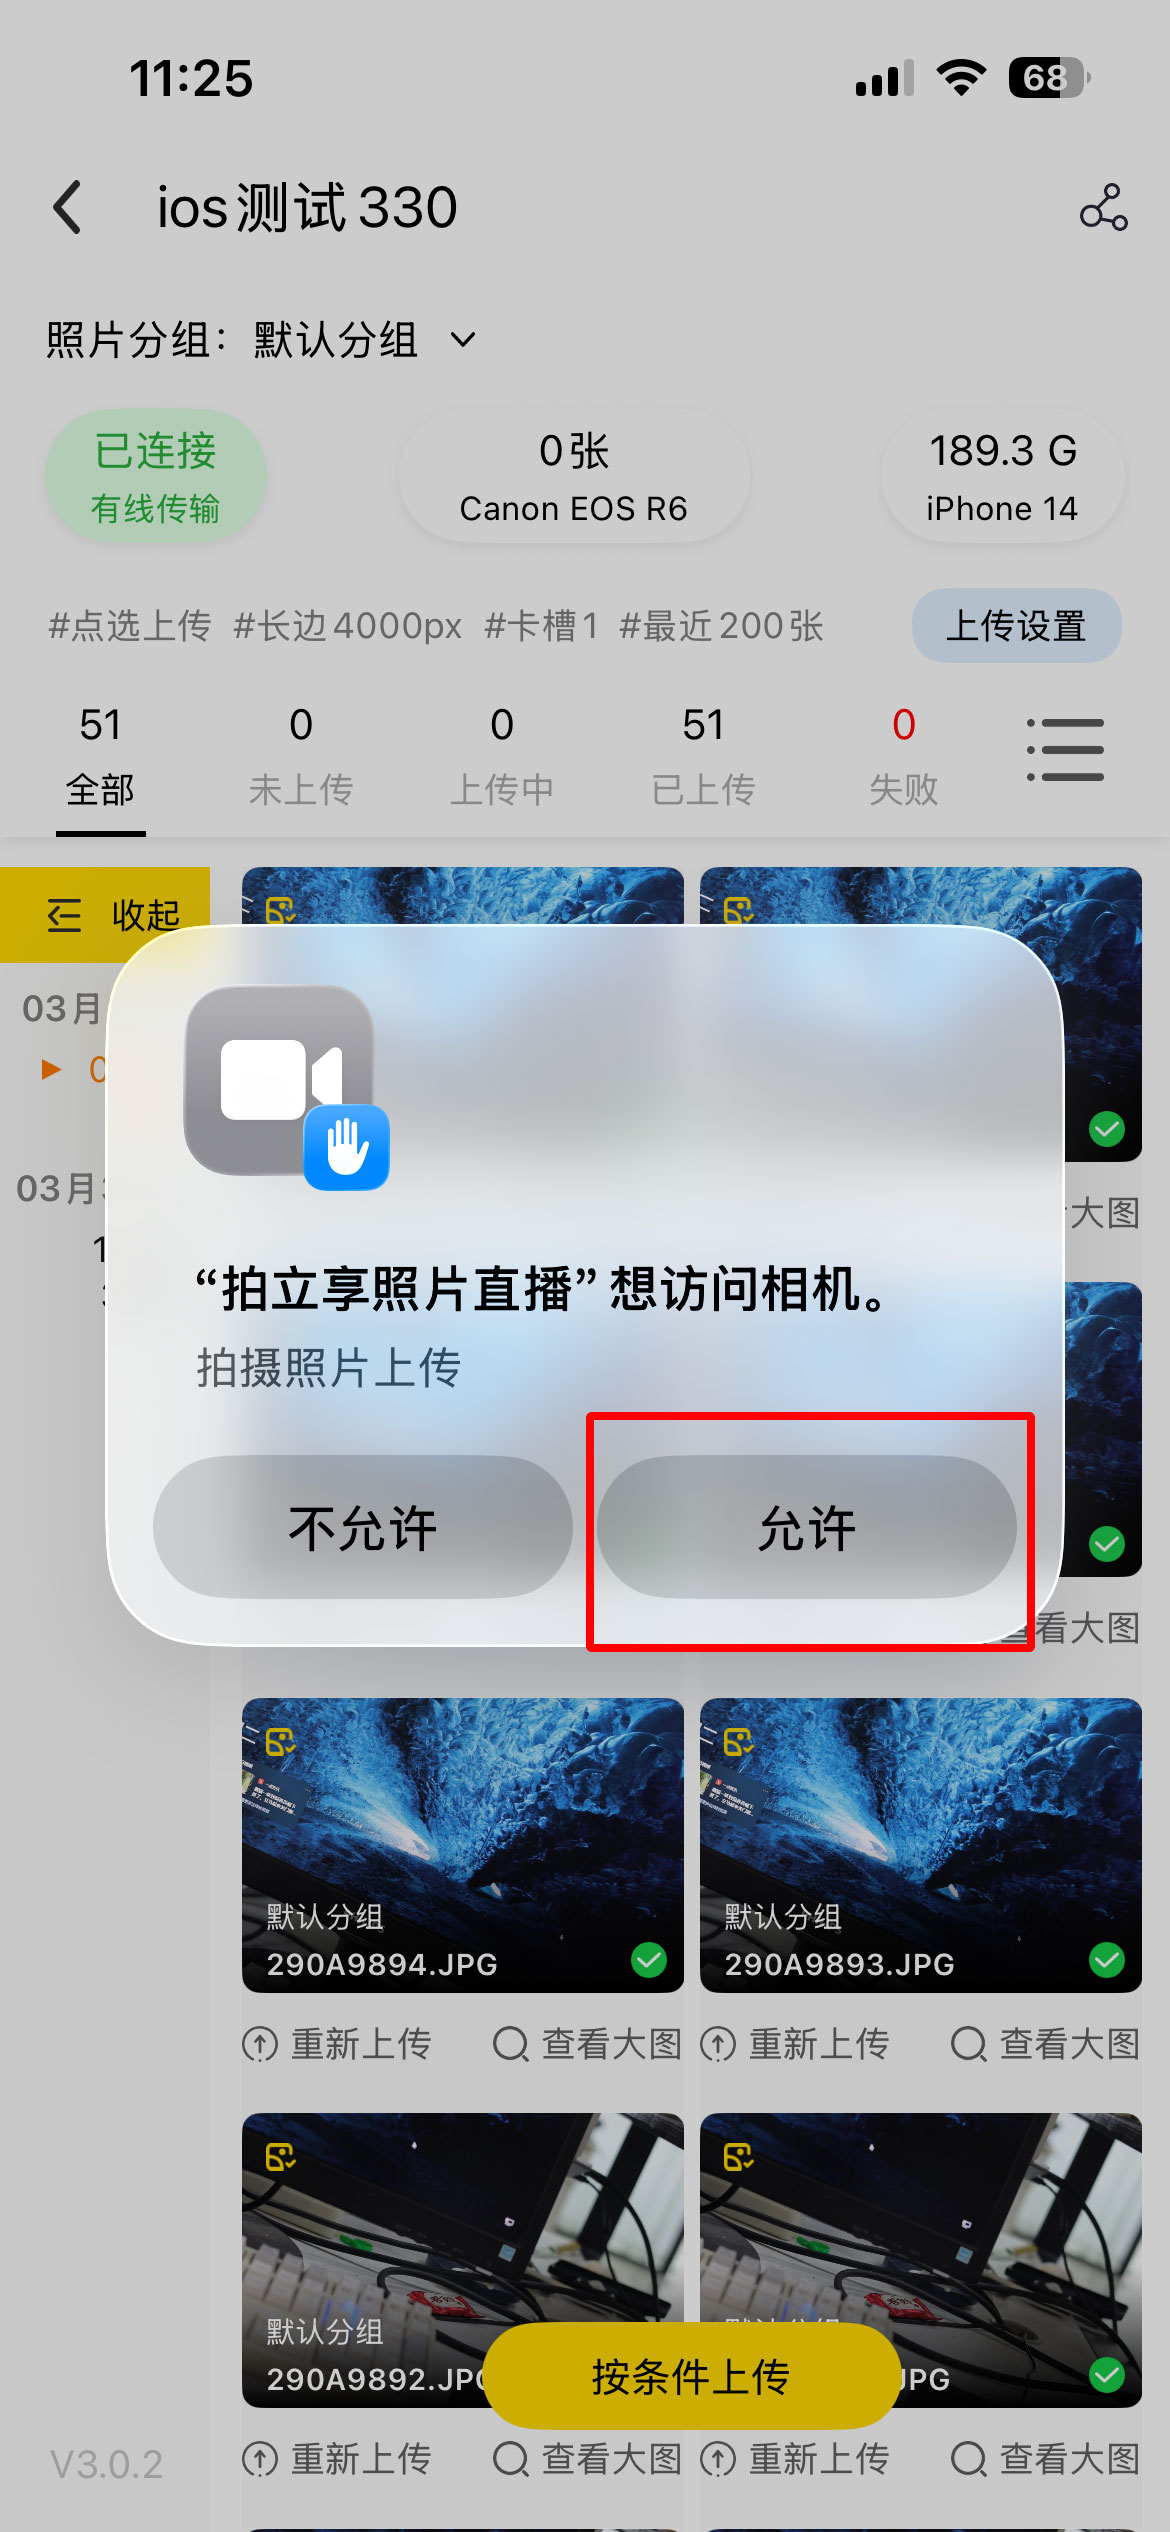
- Complete the authorization according to the system prompts (such as accessing USB devices/photos, etc.). As shown below:
- If you accidentally click reject, you can unplug the data cable on the phone side and plug it in again, and then authorize according to the prompts.
- When the upper left corner of the interface shows a green "Camera Connected", it means the connection is successful and you can start shooting and uploading.
Note: If the shoot and upload page prompts disconnected, please first check whether the camera communication function has been turned off, whether the photo format is JPG/JPEG, and replug the connection.
Common Problem Solving
- Cannot connect to the camera (no response after repeated plugging and unplugging).
- Confirm that the camera Bluetooth/Wi-Fi/FTP etc. are turned off.
- Confirm that the iOS version is relatively new (iOS 15 and above is recommended).
- Confirm that you are using an OTG cable/adapter cable that supports data transmission, and replace the cable and try again if necessary.
- When the authorization pop-up appears, only allow "UPHOTO Live" to access; if the authorization is not complete, you can complete the relevant permissions for the App in the system settings and try again.
- Some models (such as R6/R6II/R7/R8, etc.) may need to set "Choose USB connection app" to "Photo Import/Remote Control".
- If the system occasionally does not recognize it, you can wait and replug according to the prompt (wait about 30 seconds after each unplugging/plugging).
- The connection is successful but photos cannot be recognized/transferred.
- Confirm that the photo is in JPG/JPEG format (Apple wired usually does not support RAW/HEIF).
- If HDR is enabled or HEIF/RAW formats are used, it is recommended to turn them off and shoot again to try.
- For models with multiple card slots, it is recommended to save JPG to card 1 and test with newly taken photos.
- If necessary, format the memory card before shooting and testing (be sure to back up in advance).
- The camera crashes/prompts Err or Busy, and the shutter cannot be pressed.
- You can first take out the battery to restart the camera and then connect it.
- Check whether the camera communication/automatic transfer related settings are turned on. It is recommended to turn off automatic transfer after shooting, FTP automatic transfer, etc.
- Check whether the camera and phone time are aligned, and recalibrate the time if necessary.
- Prompts errors such as "0xb10b/Format not supported".
- Usually, a non-JPG/JPEG format (RAW/HEIF/HDR, etc.) is recognized. Adjust the photo format to JPG and try again.
- The picture shows reading failure/scaling failure/duplicate checking failure, etc.
- Mostly caused by poor network or insufficient mobile phone memory. It is recommended to switch to a more stable network, close other applications, and try again after uploading in batches.