
[Canon] Apple Phone FTP Wireless Upload (5D4 as an example)
Connect your camera to your phone's personal hotspot, and use the camera's FTP function to transfer photos from the camera to the UPHOTO cloud.
Supported cameras: 5D4, 1DX3, R5, R6/R62, R7
I. Phone Settings
1. Check and modify phone name
In Phone Settings -> General -> About, change the "Name" to use simple letters and numbers,
do not include "Chinese", "spaces", and "special characters" (this name is the name of the phone's "Personal Hotspot"). As shown below:

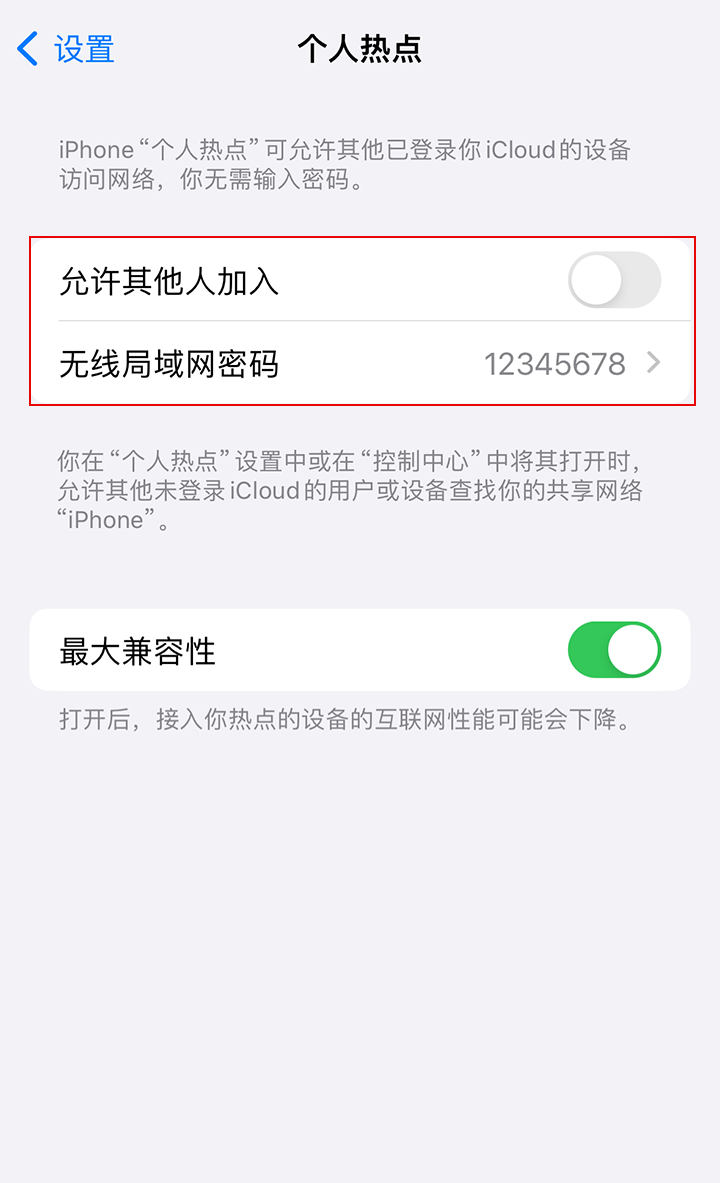
2. Turn on phone personal hotspot
In Phone Settings -> Personal Hotspot, turn on "Allow Others to Join". As shown below:
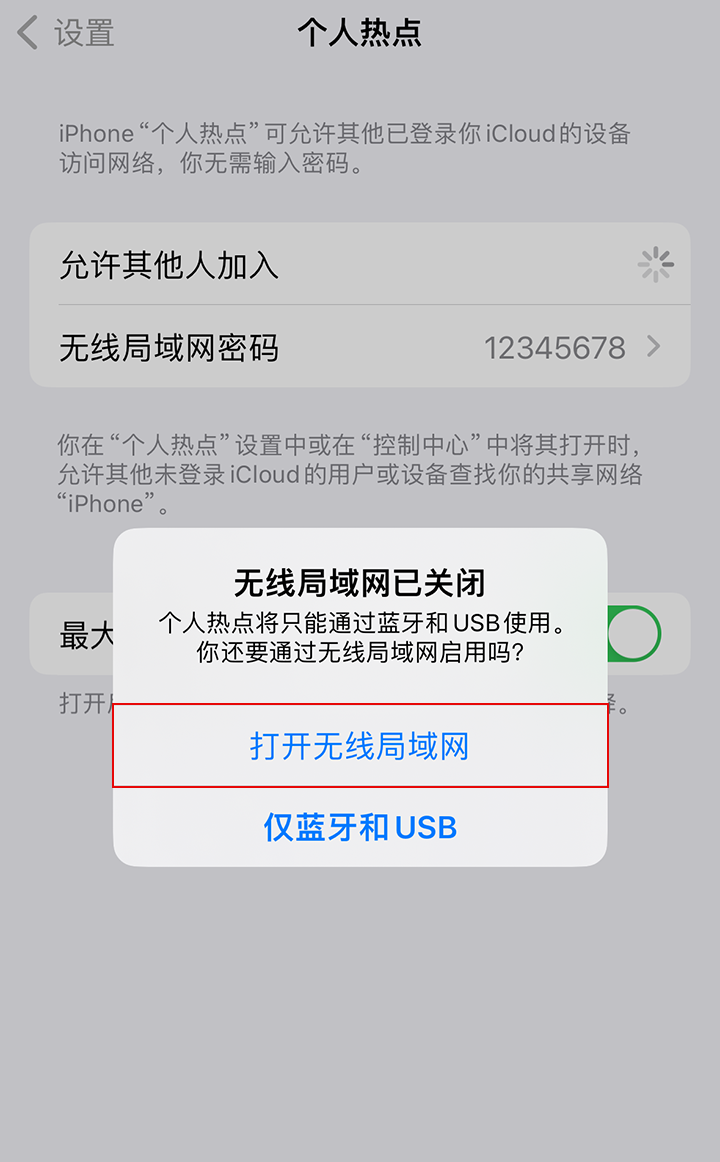
If a "Wi-Fi is Off" prompt pops up when turning on, please select "Turn on Wi-Fi". As shown below:
Note: The password of the personal hotspot must use simple letters and numbers, and do not include "spaces" and "special characters".
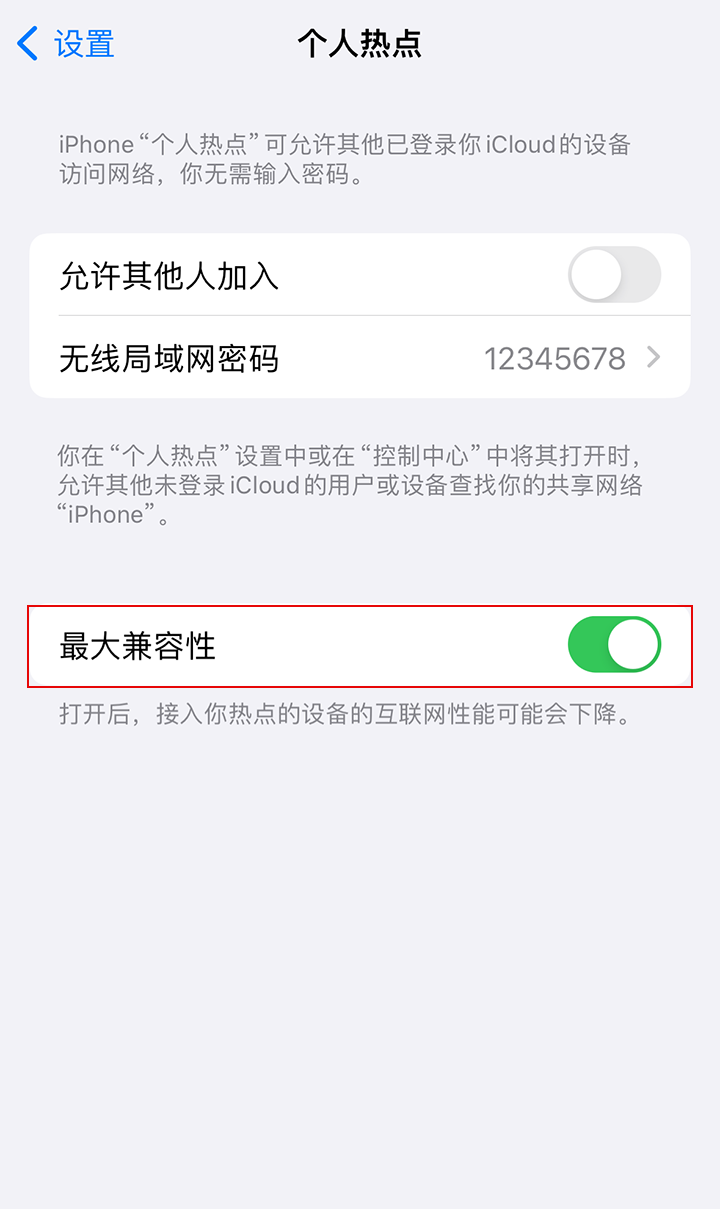
If you are using an Apple 5G phone model, you need to turn on "Maximize Compatibility". As shown below:
II. Obtain FTP Service Information
Open the "UPHOTO Live APP" and log in successfully.
In the APP album list, select the album you want to shoot, and click the "Upload Now" button.
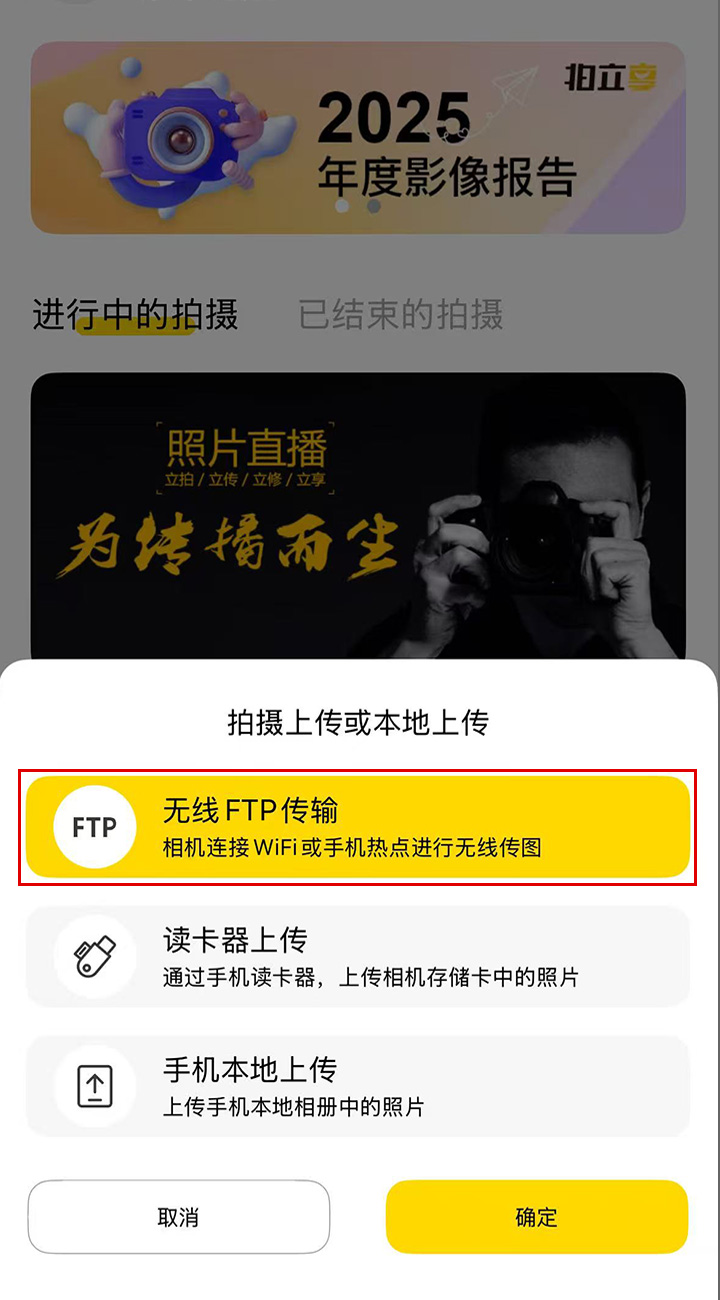
Select "Wireless FTP Transmission" in the shoot and upload or local upload page.
After selecting the photo upload group, enter the "Shoot and Upload" interface.
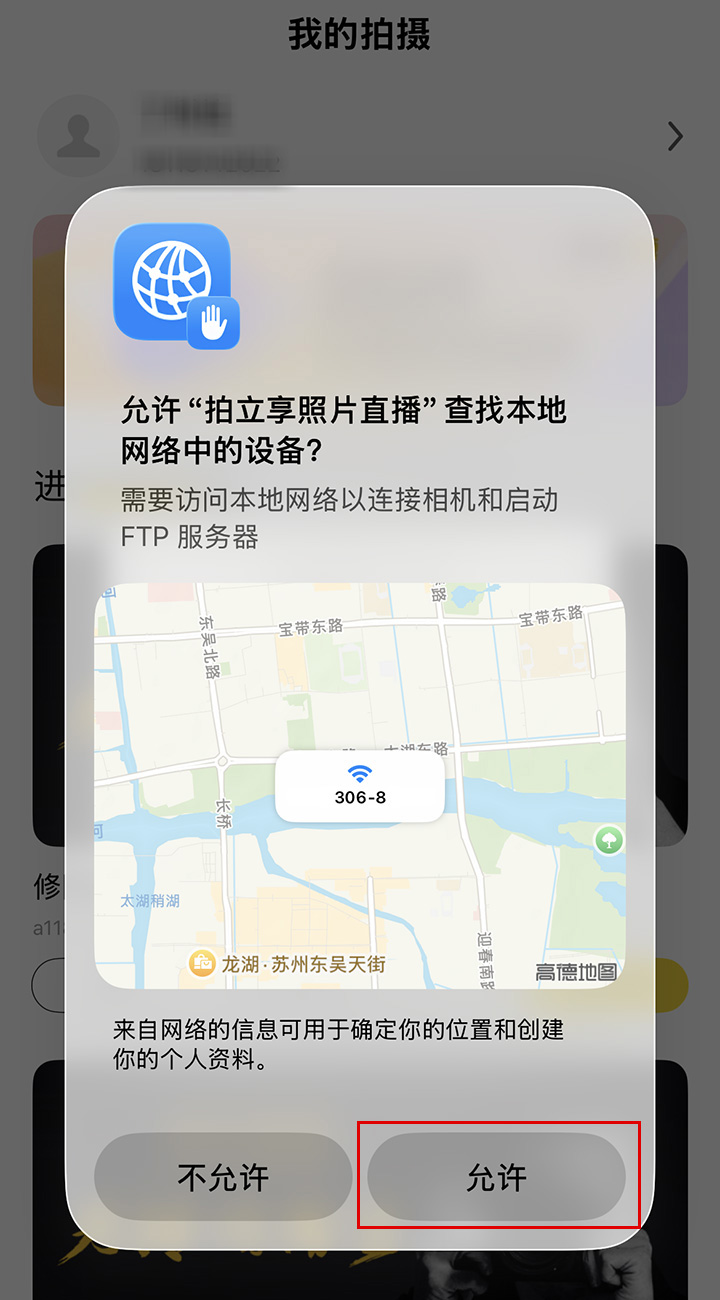
Note: If it is the first time using the "UPHOTO Live APP", an authorization request of [Allow "UPHOTO Live" to find and connect to devices on your local network?] will pop up, please click "Allow". As shown below:
The first time you enter the upload interface, "FTP Service Information" will pop up (this information will be used in subsequent camera settings); after that, click the "FTP Transfer" button again, and "FTP Service Information" will be displayed directly. As shown below:
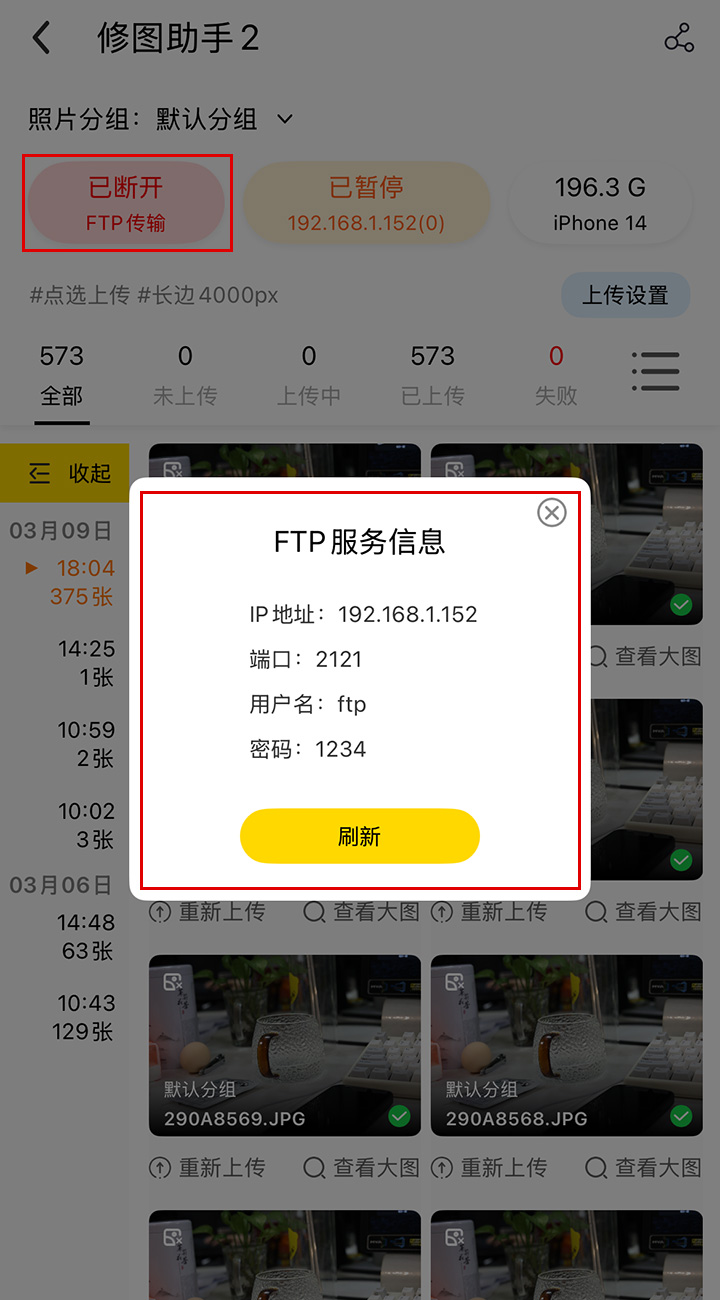
Note: If the "IP Address" shows "Failed to obtain, please check Wi-Fi or hotspot settings", it means the "IP Address" failed to be obtained. First turn off the phone's "Personal Hotspot" and then turn it on again, and then return to the "Album List" in the APP before re-entering the "FTP Upload" interface.
III. Camera Settings
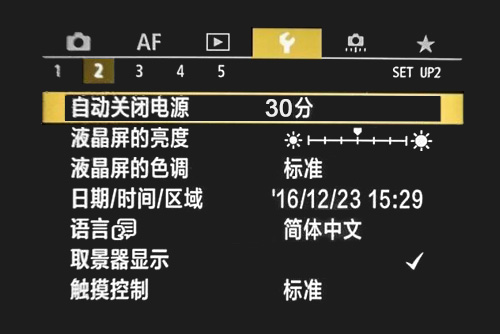
Set the camera power to the maximum time to keep the camera always on. As shown below:
Set the photo format to JPEG or JPEG+RAW format.
Set the camera date and time to the current date and time.
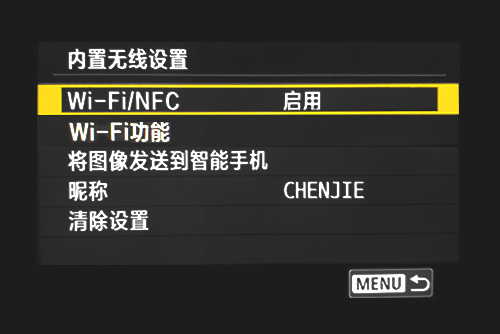
Set "Built-in Wireless Settings" (taking Canon 5D4 camera as an example).
4.1 Find "Communication Settings" -> "Built-in Wireless Settings" in "Settings".
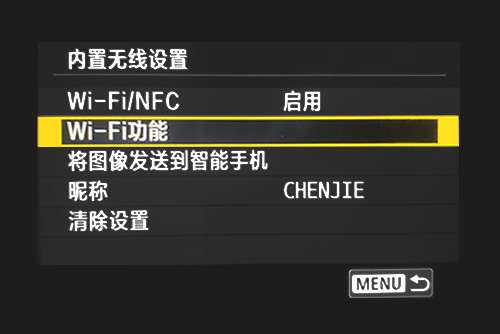
4.2 Enter "Wi-Fi/NFC" and set it to "Enable" (you need to turn off "Allow NFC connections"). As shown below:
4.3 After "Wi-Fi" is enabled, enter "Wi-Fi function". As shown below:
- Some cameras need to register a nickname when using the "Wi-Fi function" for the first time.
4.4 After entering "Wi-Fi function", select "Transfer images to FTP server". As shown below:

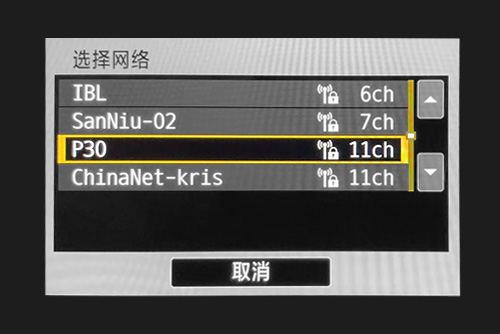
4.5 In the "Select Network" interface, select the previously enabled "Phone Personal Hotspot" and confirm. As shown below:
4.6 In the "Key format" interface, select "Enter 8 to 63 ASCII characters" and confirm, then enter the password of the "Phone Personal Hotspot" and confirm. As shown below:

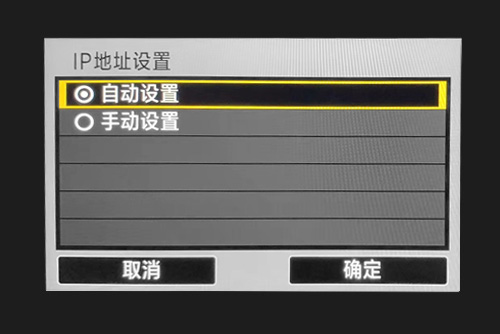
4.7 In the "IP address set." interface, select "Auto setting" and confirm. As shown below:
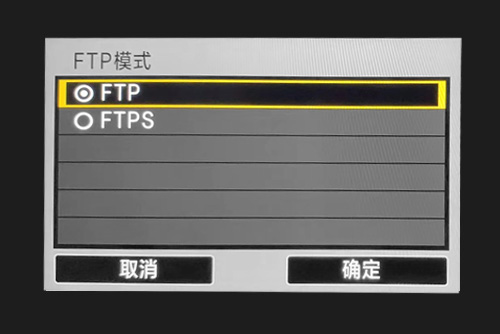
4.8 In the "FTP mode" interface, select "FTP" and confirm. As shown below:
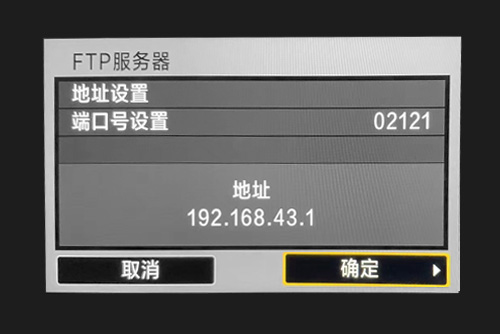
4.9 In the "FTP server" interface, set the "Address setting" and "Port No. setting" to the "IP Address" and "Port" in the FTP information displayed in the UPHOTO APP respectively, and then confirm. As shown below:
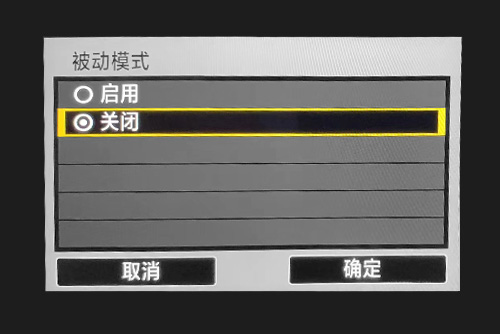
4.10 In the "Passive mode" interface, select "Disable" and confirm. As shown below:
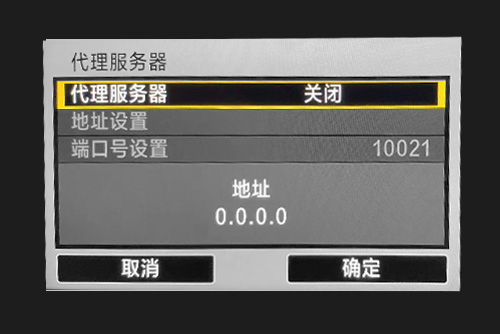
4.11 In the "Proxy server" interface, set the "Proxy server" to "Disable" and confirm. As shown below:
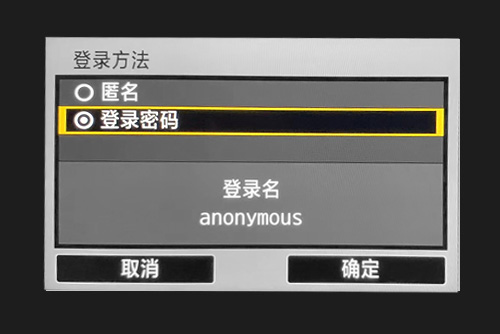
4.12 In the "Login method" interface, select "Login password" and confirm, then respectively enter the "Username" and "Password" in the FTP information displayed in the UPHOTO APP, and then confirm. As shown below:
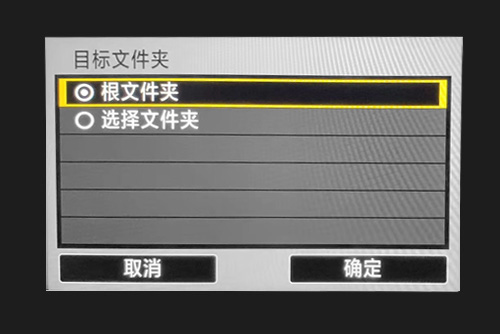
4.13 In the "Target folder" interface, select "Root folder" and confirm. As shown below:
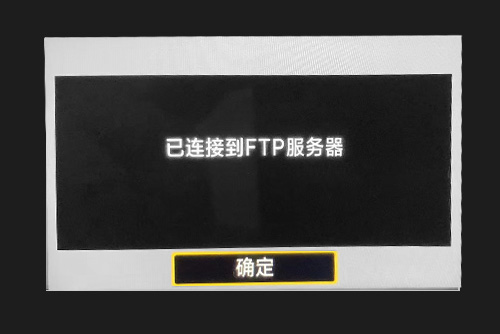
4.14 If it shows "Connected to FTP server", it means the connection is successful, click "OK" to return; otherwise, repeatedly check whether the above steps are set correctly.
Also check whether the "Phone Personal Hotspot" has been turned off. If it is turned off, turn it on again, and turn off and then turn on the "FTP Wireless Upload" function in the UPHOTO APP.
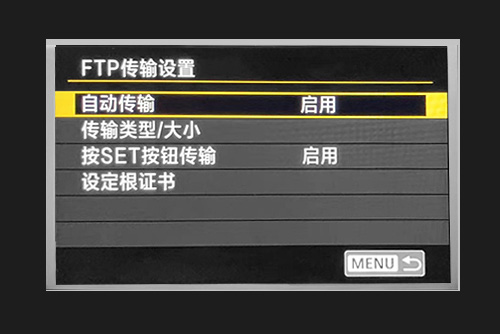
Set "FTP transfer settings" (taking Canon 5D4 camera as an example).
5.1 Find "Communication Settings" -> "FTP transfer settings" in "Settings". As shown below:

5.2 Set "Automatic transfer" to "Enable". As shown below:
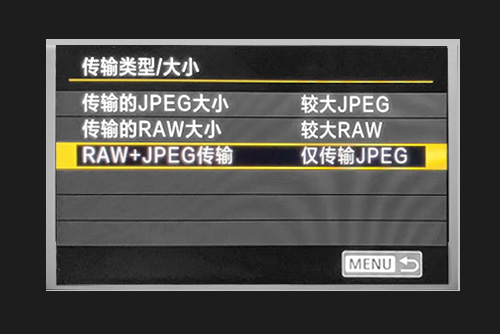
5.3 Set "Transfer type/size" to "JPEG size to transfer: Larger JPEG".
5.4 Set "Transfer with RAW+JPEG" to "JPEG only". As shown below:
Set "FTP directory structure" (taking Canon 5D4 camera as an example).
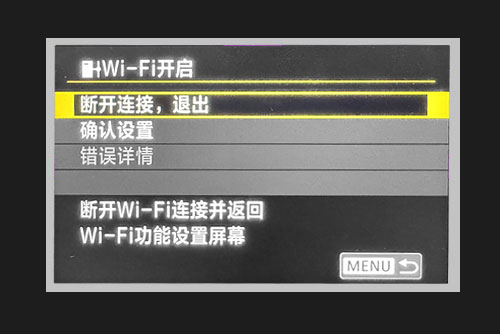
6.1 Find "Communication Settings" -> "Built-in Wireless Settings" -> "Wi-Fi function" in "Settings", select "Disconnect, exit". As shown below:
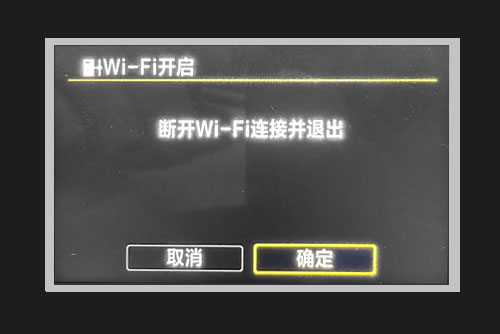
6.2 Confirm "Disconnect Wi-Fi and exit". As shown below:
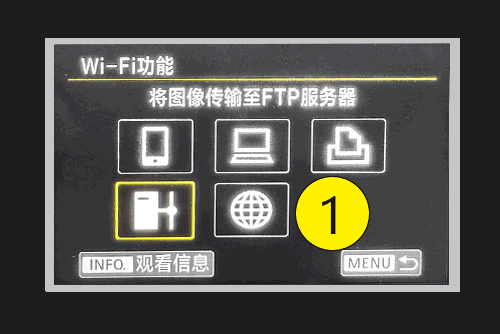
6.3 Select "Transfer images to FTP server" in "Wi-Fi function" -> "Review/change setting" -> "Change set." -> "FTP server" -> "Directory structure", set "Directory structure" to "Default". As shown below:
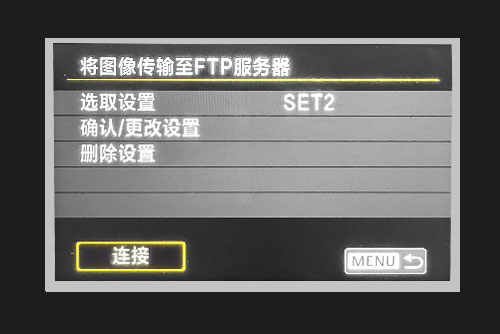
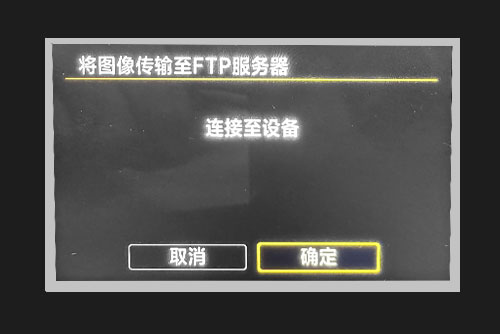
6.4 After returning to the "Transfer images to FTP server" interface, click "Connect". As shown below:
6.5 In the "Transfer images to FTP server" interface, click "Connect to device". As shown below:
IV. Shoot and Upload
After the camera takes a photo, the photo will be automatically transferred to the photo list of the "UPHOTO Live APP".
V. Common Problem Solving
- Manually select photos to upload via FTP (taking Canon 5D4 camera as an example).
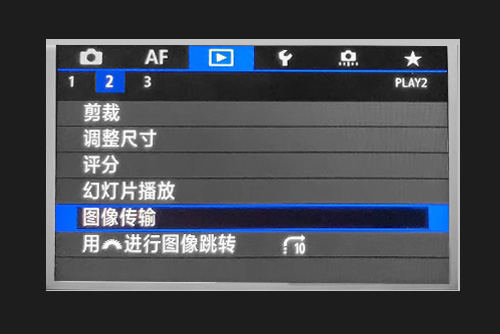
1.1 Find "Image transfer" in "Playback". As shown below:
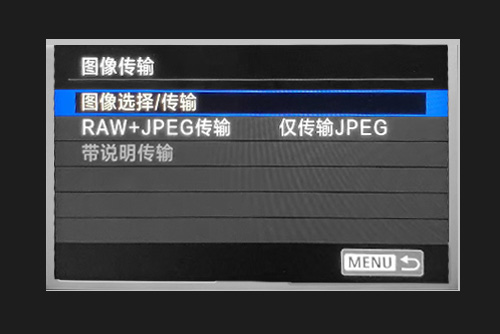
1.2 In the "Image transfer" interface, select "Image sel./transfer" and enter. As shown below:
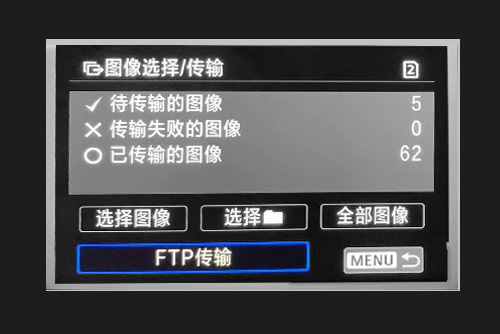
1.3 In the "Image sel./transfer" interface, select "Sel.Image" or "Select" to choose the photos to be uploaded, and then click "FTP transfer" to upload the photos. As shown below:
- The camera is connected successfully, but the APP cannot recognize the photos in the camera.
- Check if the camera's photo format is set to JPEG or JPEG+RAW format.
- Format the memory card, take a new photo and try again.